As I promised in my Halloween post, here's a technique I came up with!
Basically, you let nail polish dry on a plastic surface, and then you can hole punch it, which can then be attached to the nails.
But here's a more detailed, picture tutorial. This is my first tutorial, so if it needs something more, let me know! (Ooo, maybe I should put it on Instructables!)
What you need: Hole punchers, nail polish, something plastic.
Here are the shaped hole punchers I used, found at Michael's for a dollar each (I also used a regular hole punch):
First, paint your desired colours on something plastic. I chose a random ziploc bag.
I found it was generally better to do two coats, even if the polish only requires one for opacity. Remember the hole puncher is expecting something as thick as paper.
Next, wait several hours. A full 24 is a little excessive, but will definitely work. I waited about eight hours before using mine.
Once they are fully dry, they should be fairly easy to peel off the plastic.
I found the easiest way to do this was to fold the bag over at the edge, and gently peel it off with your nails (or a pair of tweezers).
You can then hold it:
And then insert it in the hole puncher like paper!
And then punch.
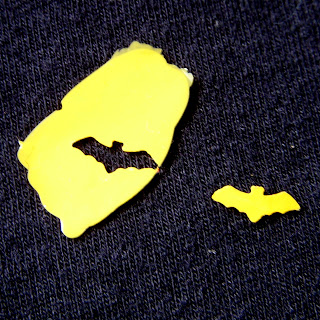
You'll then have a cut out!
This is best applied to slightly wet nail polish, but it'll stick enough to even a dry, week old manicure so that you can put top coat on:
Put a top coat on and call it done, or decorate as desired with free hand nail art!
This is fun, way easier than free handing, and for me, easier than stamping. It also has the bonus that for things like the sparkly red, where I never would have built up enough coats for opacity if I was stamping, I could easily put a base of a regular red and then paint over it with the sparkly red, without fear. :)
This could also easily work for cutting out shapes with scissors, and so on. I'll surely use it again!
Give it a try, let me know how it goes! :)


No comments:
Post a Comment